Exposing services in my cluster using cloudflare tunnels
I’ve been looking into ways to safely expose services in my k3s cluster to the internet. Seeing how cloudflare tunnels are free, and look pretty simple to set up, I figured I would give it a try. In fact, it’s how I expose the blog you’re reading right now.
Cloudflare Tunnels
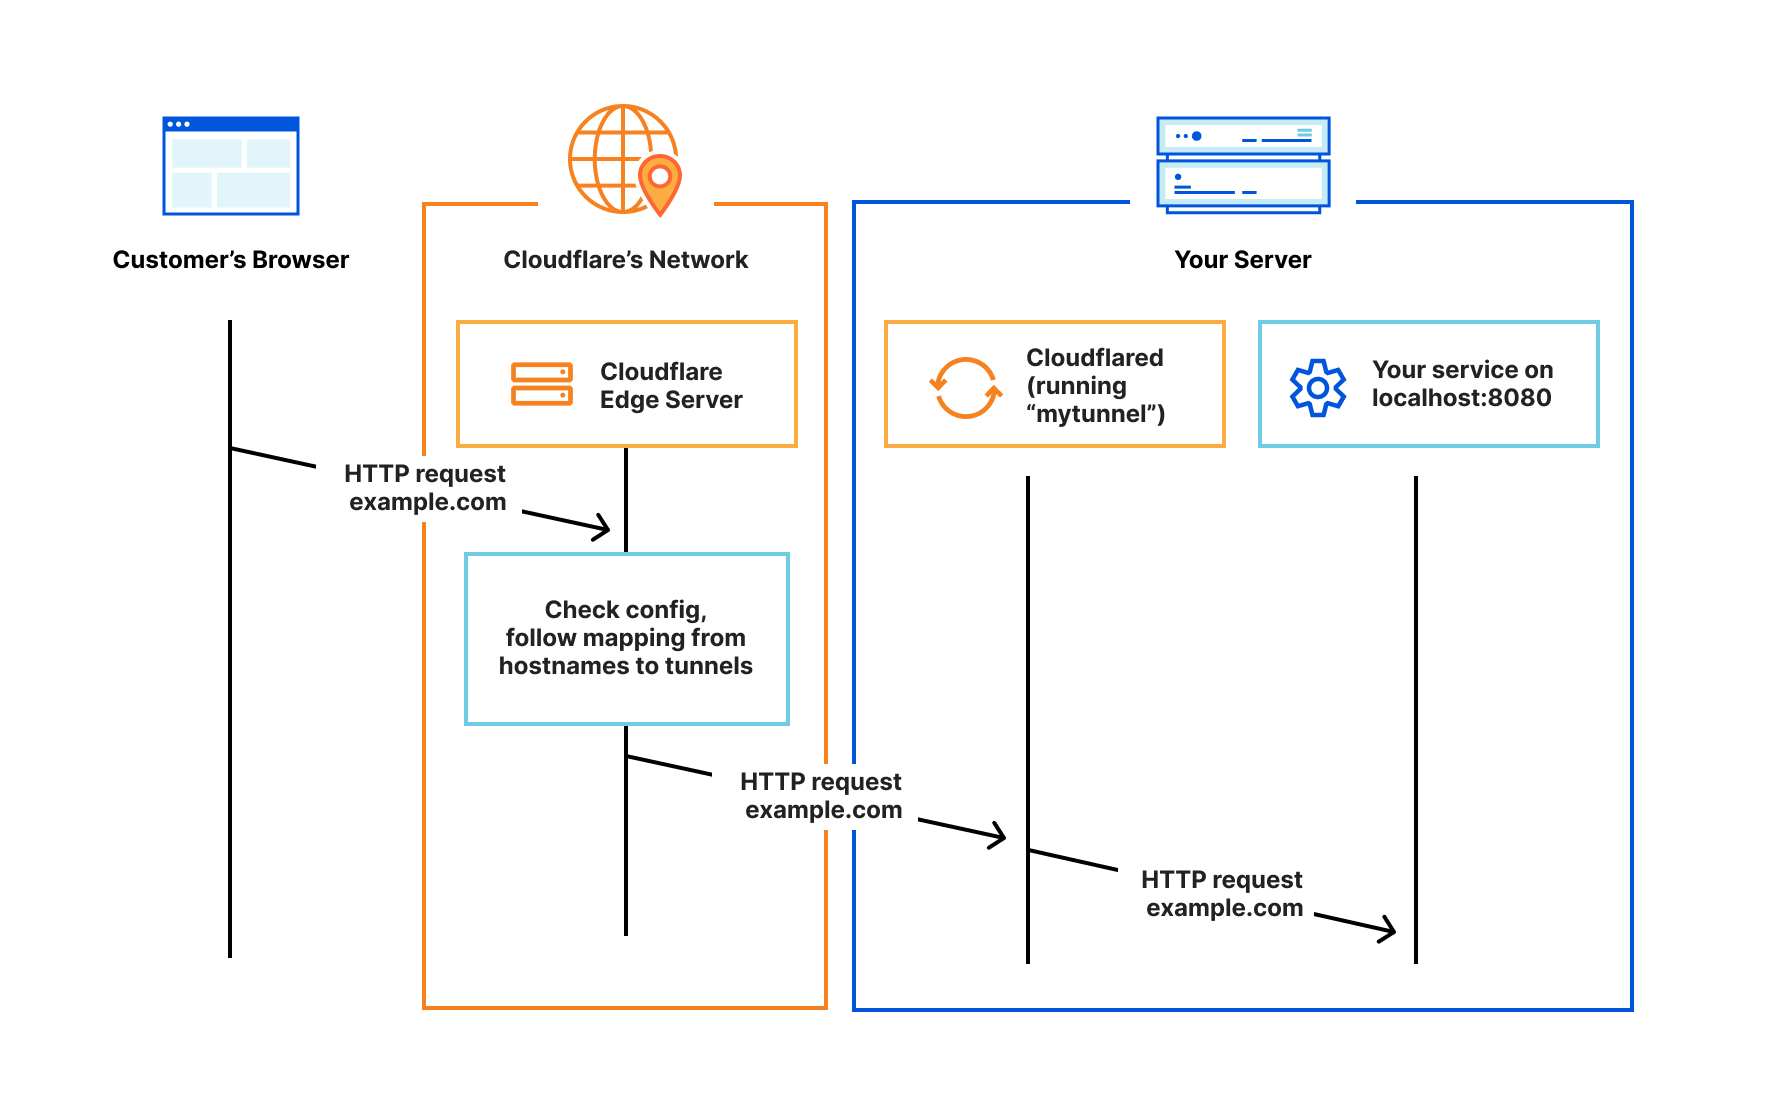
Cloudflare Tunnel provides you with a secure way to connect your resources to Cloudflare without a publicly routable IP address. Instead, a lightweight daemon in your infrastructure called cloudflared creates outbound-only connections to Cloudflare’s edge.

To get started with using tunnels, we need to install the cloudflared daemon into my cluster and point to my blog service.
Getting started
To get started, we’ll be following cloudflare’s article on exposing a kubernetes app to the internet.
I chose to install the cloudflared cli following these instructions.
Obtaining a certificate
To get a certificate, log in using the cloudflared cli.
cloudflared tunnel login
Next, create a secret from the certificate we were just issued.
$ kubectl create secret -n cloudflared generic tunnel-cert --from-file=/path/to/cert.pem
All done, next step.
Creating the tunnel & obtaining tunnel credentials
Create your tunnel.
$ cloudflared tunnel create my-home-tunnel
Tunnel credentials written to /Users/
Created tunnel my-home-tunnel with id
Now we can store our credentials as a kubernetes secret
$ kubectl create secret generic tunnel-credentials --from-file=homelab.json=/Users/<your-user>/.cloudflared/<your-tunnel-id>.json
Associating your tunnel to a DNS record
The cloudflared cli makes this easy to do.
For example, my command looked similar to this to tie my tunnel to blog.kyledev.co.
$ cloudflared tunnel route dns my-home-tunnel blog.kyledev.co
This should create a CNAME record for you.

Deploying cloudflared to the cluster
Before we deploy cloudflared, we need to create a configmap for the deployment to use
apiVersion: v1
kind: ConfigMap
metadata:
  name: cloudflared
  namespace: cloudflared
data:
  config: |
    tunnel: <your-tunnel-id>
    credentials-file: /etc/cloudflared/creds/homelab.json
    no-autoupdate: true
    metrics: 0.0.0.0:2000
    ingress:
      - hostname: blog.kyledev.co
        service: http://blog.blog.svc.cluster.local:80
      - service: http_status:404
    protocol: http2
My blog lives in a different namespace than the cloudflare deployment, but we can still access it at http://blog.blog.svc.cluster.local:80.
If you want to store your cloudflare manifests in git, I recommend using something like sealedsecrets or doppler to mount your configmap to your pod as a secret instead.
$ k get svc -n blog
NAME   TYPE        CLUSTER-IP     EXTERNAL-IP   PORT(S)   AGE
blog   ClusterIP   10.43.81.250   <none>        80/TCP    7d1h
Here is the full yaml for the deployment. Take note we need to mount the tunnel-cert and tunnel-credentials to the container.
cloudflared.yaml
apiVersion: apps/v1
kind: Deployment
metadata:
  name: cloudflared
  namespace: cloudflared
spec:
  selector:
    matchLabels:
      app: cloudflared
  replicas: 1
  template:
    metadata:
      labels:
        app: cloudflared
    spec:
      containers:
        - name: cloudflared
          image: cloudflare/cloudflared:2023.2.1
          args:
            - tunnel
            - --config
            - /etc/cloudflared/config/config.yaml
            - run
          livenessProbe:
            httpGet:
              path: /ready
              port: 2000
            failureThreshold: 1
            initialDelaySeconds: 10
            periodSeconds: 10
          volumeMounts:
            - name: config
              mountPath: /etc/cloudflared/config/config.yaml
              subPath: config.yaml
            - name: creds
              mountPath: /etc/cloudflared/creds/homelab.json
              subPath: homelab.json
            - name: cert
              mountPath: /etc/cloudflared/cert.pem
              subPath: cert.pem
      volumes:
        - name: creds
          secret:
            secretName: tunnel-credentials
        - name: cert
          secret:
            secretName: tunnel-certificate
        - name: config
          configMap:
            name: cloudflared
            items:
              - key: config
                path: config.yaml
---
apiVersion: v1
kind: ConfigMap
metadata:
  name: cloudflared
  namespace: cloudflared
data:
  config: |
    tunnel: <your-tunnel-id>
    credentials-file: /etc/cloudflared/creds/homelab.json
    no-autoupdate: true
    metrics: 0.0.0.0:2000
    ingress:
      - hostname: blog.kyledev.co
        service: http://blog.blog.svc.cluster.local:80
      - service: http_status:404
    protocol: http2
$ kubectl apply -f cloudflared.yaml
Check out the deployment, mine has been running for a few days.
$ k get pods -n cloudflared
NAME                          READY   STATUS    RESTARTS   AGE
cloudflared-7b99d68b4-v6vfj   1/1     Running   0          3d2h
At this point, I could reach my blog externally from my local network without having to port forward. Pretty cool stuff.
I only wanted to expose my blog and other services selectively, but I believe you could always wildcard an ingress entry to point to your ingress controller, allowing you to expose all services running in your cluster.
ingress:
  - hostname: *.kyledev.co
    service: http://ingress-nginx-controller.ingress-nginx.svc.cluster.local:443